Advanced Interior Design Techniques with AI
Modern interior work is no longer just about “making a room look nice.”
Designers, architects, and real estate professionals need to replace specific furniture, swap materials, convert CAD drawings into photorealistic renderings, change lighting from day to night, and even rotate the viewing angle of a room — often under tight timelines and budget pressure.
Most basic AI tools can’t handle this level of control. They can make pretty images, but they struggle with precise, production-ready transformations.
This guide walks you through 9 advanced interior design techniques with AI using Banana Designer, showing exactly how to turn existing photos, CAD drawings, and references into professional assets you can use with clients.
The Problem
You need more than just styling — you need to:
- Replace specific furniture pieces without breaking the rest of the image
- Swap fabrics and materials while keeping structure and lighting
- Turn CAD floor plans into rendered views
- Change time of day or lighting across the whole scene
- Shift the viewing angle while preserving room layout
Basic AI generators can’t give you precise control over what changes and what must stay exactly the same.
The Solution
Use advanced AI techniques powered by Nano Banana to perform professional-grade transformations that used to require 3D software, dedicated rendering teams, or expensive agencies.
With the right prompts and workflows, you can:
- Rebuild scenes from multiple references
- Edit only specific areas
- Control lighting, materials, and composition
- Produce client-ready visuals in minutes
What You'll Learn
In this guide, you’ll learn:
- 9 advanced techniques for professional interior design transformations
- Precise editing methods for furniture, materials, and lighting
- Technical workflows for CAD rendering and viewing angle manipulation
- Real-world applications for designers, architects, and real estate professionals
Who This Guide Is For
- Interior designers and stylists
- Architects and visualization teams
- Real estate photographers and virtual staging pros
- Anyone using AI to create or refine interior visuals
Prerequisites
If you’re new to styling, start with our Interior Design Styles Guide first, then come back to these advanced techniques.
9 Advanced Interior Design Techniques
Below are 9 workflows you can use directly in Banana Designer. Each includes a concrete example prompt plus pro tips so you can adapt it to your own projects.
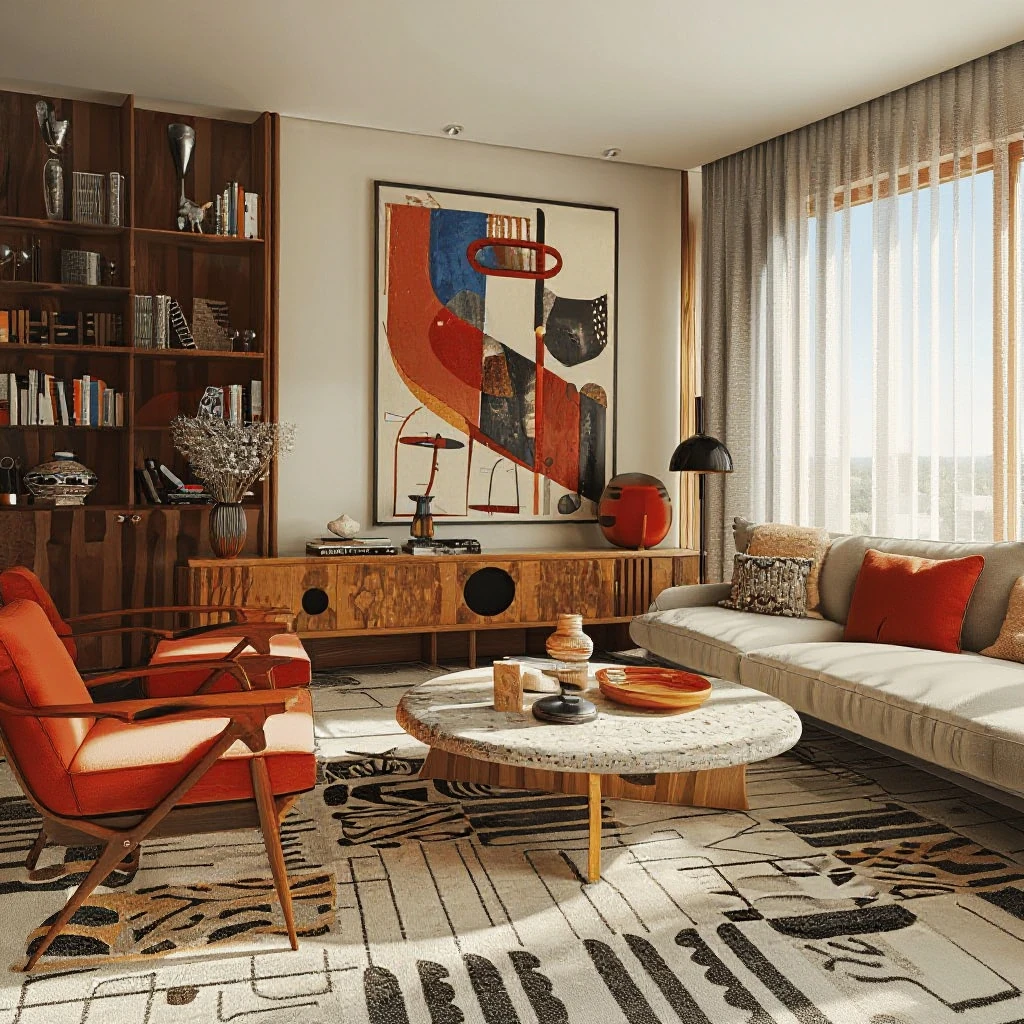
Technique 1: Piece Multiple Furniture into One Space
Best For: Creating custom room layouts, combining furniture from different sources, client presentations
The Challenge:
You have photos of individual furniture pieces (sofa, chair, table, lamp) and want to see them all together in one room.
The Solution:
Upload multiple furniture images plus your base room image. Nano Banana understands spatial relationships and composes them naturally.
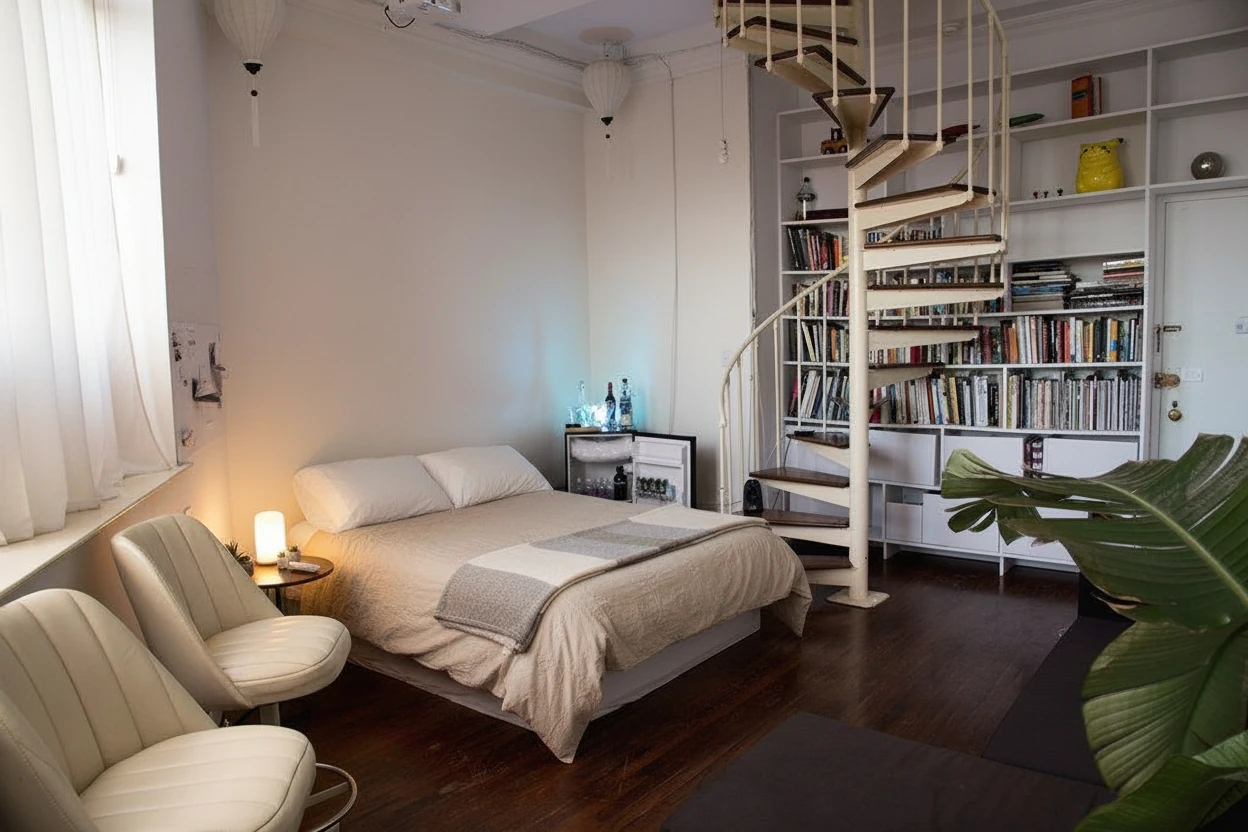
Click on the image to view the input images.
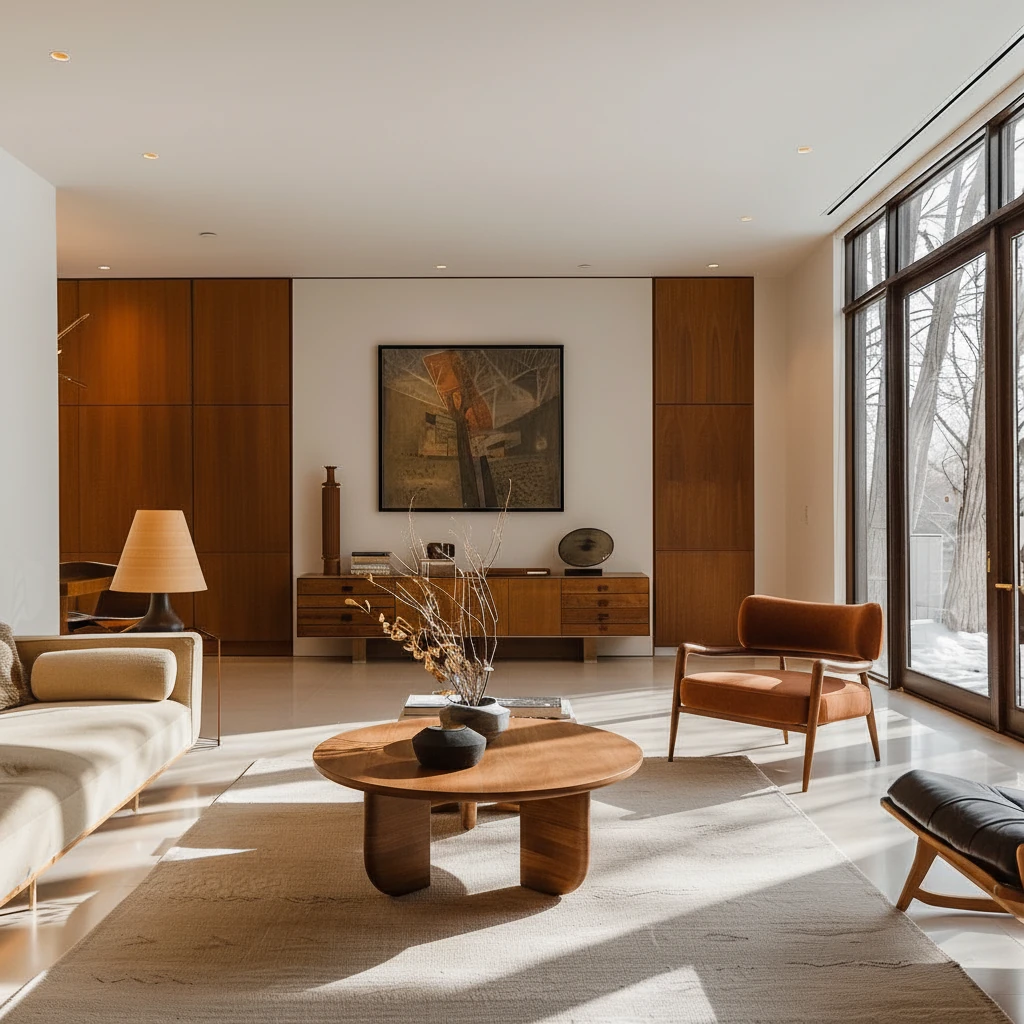
Let's remove the coffee table and the arm chair from the living room (image 1), and replace them using coffee table from image 2 and arm chair from image 3, keep the design details of these furnitures when placing them into the scene, and keep the rest of the scene in image 1 unchanged when creating the new image (use the same viewing angle and perspective)
Example Prompt:
Let's remove the coffee table and the arm chair from the living room (image 1), and replace them using coffee table from image 2 and arm chair from image 3, keep the design details of these furnitures when placing them into the scene, and keep the rest of the scene in image 1 unchanged when creating the new image (use the same viewing angle and perspective)
Pro Tips:
- Number your images clearly (image 1 = base room, image 2–4 = furniture)
- Specify placement: "sofa against the back wall," "coffee table in the center"
- Mention scale: "maintain realistic proportions"
- Request lighting consistency: "match the room's natural lighting"
Having 4–5 reference images might work in certain cases, but if you want more accurate control, you should break them into multiple batches and modify the image in multiple steps. This allows the model to pay more attention to your instructions and the details of the reference images.
Why This Works:
Nano Banana's multi-image composition excels at understanding spatial relationships and can intelligently place multiple objects while respecting perspective, scale, and lighting.
Best Model: Nano Banana (15–45s, advanced spatial reasoning)
Technique 2: Replace Specific Furniture from a Room
Best For: Testing furniture options, client revisions, before/after comparisons
The Challenge:
You want to replace just the sofa (or table, or chair) in a room without changing anything else.
The Solution:
Specify exactly which furniture piece to replace and describe the new one in detail.
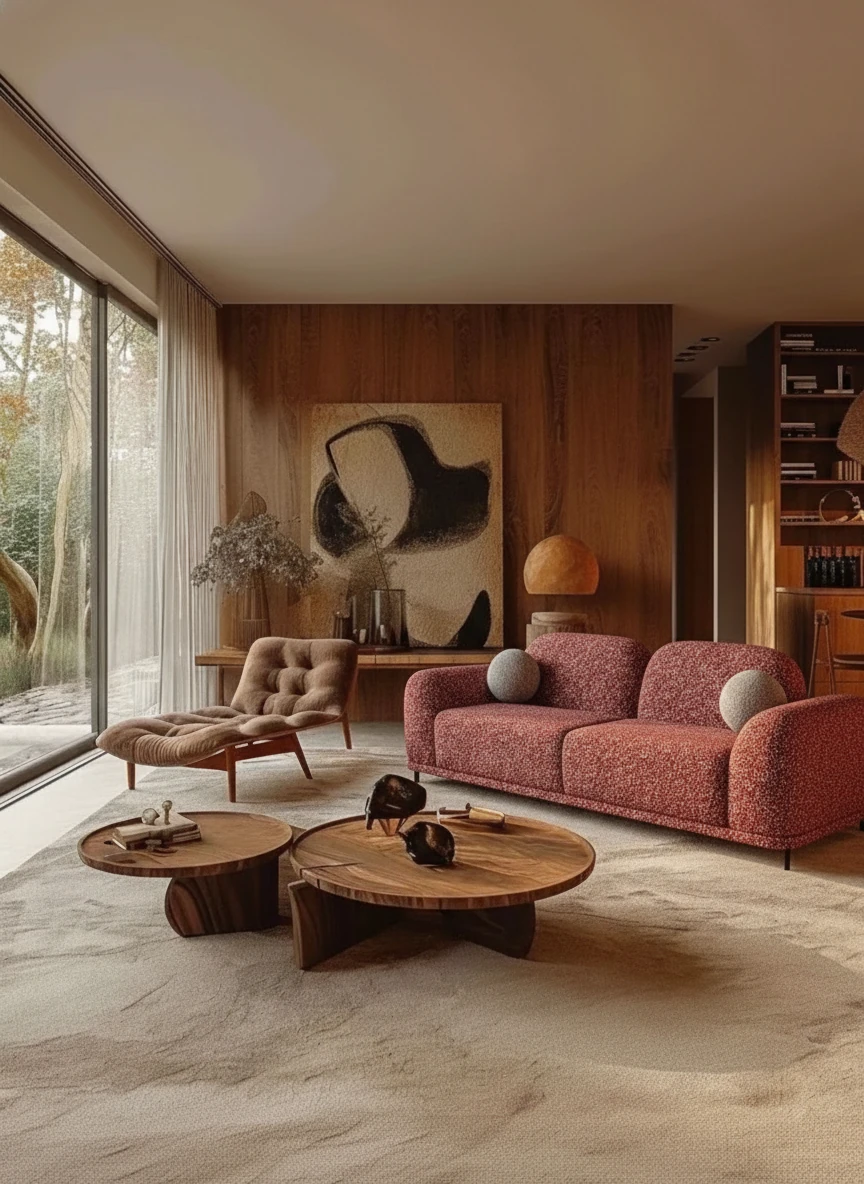
Let's replace the white sofa on the right of the source image (image 1) with the red sofa from image 2 and place it about 45 degrees facing the window, and make sure you maintain the red sofa's design details when placing it in the scene, enhance the image quality and keep the rest unchanged.
Example Prompt:
Let's replace the white sofa on the right of the source image (image 1) with the red sofa from image 2 and place it about 45 degrees facing the window, and make sure you maintain the red sofa's design details when placing it in the scene, enhance the image quality and keep the rest unchanged.
Pro Tips:
- Be specific about what to keep: "keep everything else the same"
- Describe the replacement in detail: material, color, style, size
- Mention lighting: "match existing lighting and shadows"
- Specify scale: "ensure it fits the space naturally"
Best Model: Nano Banana (precise object replacement with context preservation)
Learn more: Precision Editing with Nano Banana
Technique 3: Replace Textile/Fabrics in a Room
Best For: Testing fabric options, color coordination, material exploration
The Challenge:
You want to change curtains, cushions, throws, rugs, or upholstery fabrics without redesigning the entire room.
The Solution:
Specify which textiles to change and describe the new fabric, pattern, or color using either words or images.
Replace the white carpet under the sofa and coffee table from the image to a red woven style carpet. Keep the rest of the image unchanged.
Example: Change Carpet Fabric
Replace the white carpet under the sofa and coffee table from the image to a red woven style carpet. Keep the rest of the image unchanged.
Pro Tips:
- Specify fabric type: linen, velvet, bouclé, silk, cotton
- Mention texture: smooth, textured, woven, knitted
- Describe pattern: solid, striped, geometric, floral, vintage
- Consider light interaction: "show how light reflects on velvet"
Why This Works:
AI can isolate textile elements and apply new materials while preserving the underlying structure, lighting, and room context.
Best Model: Nano Banana (material accuracy and texture rendering)
Technique 4: Change Time of Day (Day to Night Transformation)
Best For: Showing lighting design, ambiance variations, real estate marketing
The Challenge:
You have a daytime photo but want to show how the space looks at night with interior lighting.
The Solution:
Describe the desired time of day and lighting conditions in detail.
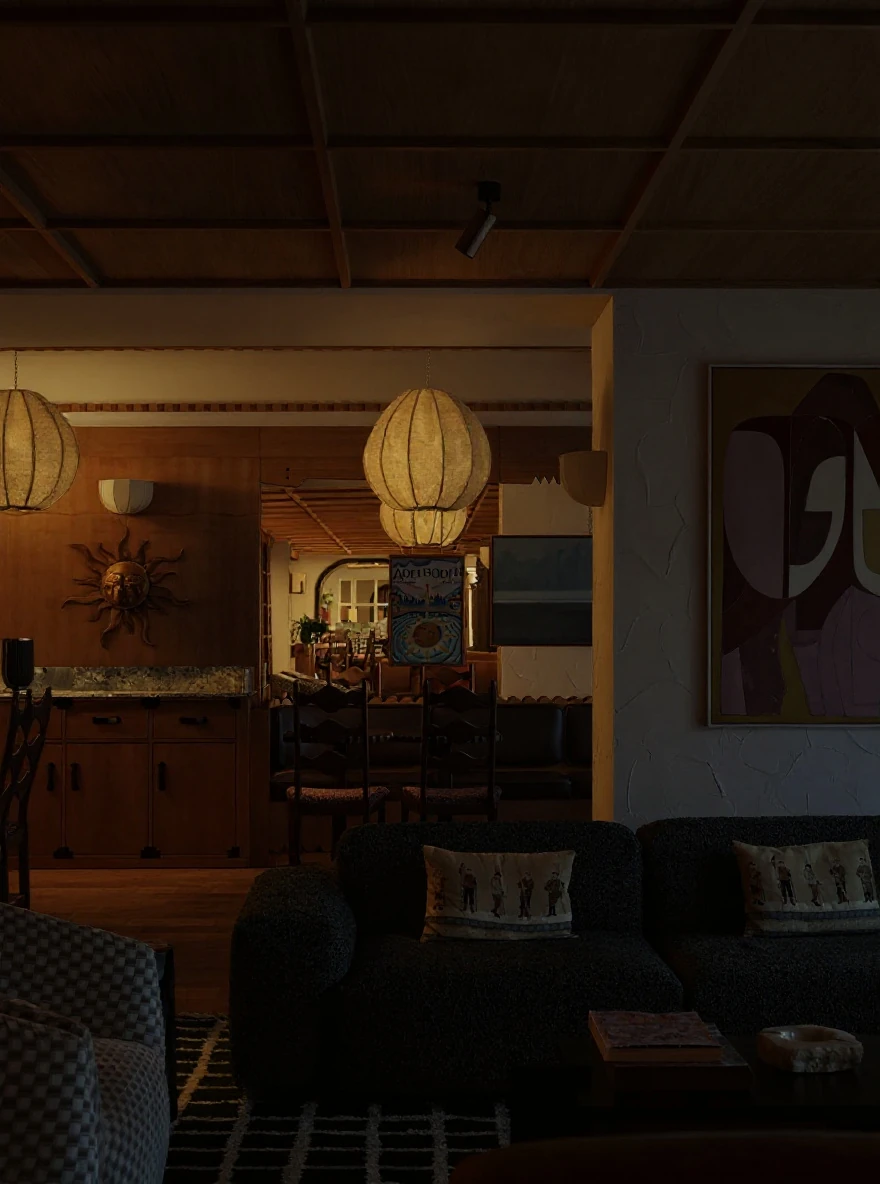
Change the time of the photo from day time to 8pm in the evening, turn off the natural light coming into the room, turn on the interior's lightings, including the ceiling lamps to brighten up the room making it look like a cozy evening making the interior look bright.
Example: Day to Evening
Change the time of the photo from day time to 8pm in the evening, turn off the natural light coming into the room, turn on the interior's lightings, including the ceiling lamps to brighten up the room making it look like a cozy evening making the interior look bright.

Change the time of the photo from day time to 8pm in the evening, turn off the natural light coming into the room, turn on one of the ceiling lamps further in the distance to brighten up a corner of the room making it look like a cozy evening.
Example: Control of the Light
Change the time of the photo from day time to 8pm in the evening, turn off the natural light coming into the room, turn on one of the ceiling lamps further in the distance to brighten up a corner of the room making it look like a cozy evening.

Change this space to golden hour lighting (late afternoon). Show warm, soft sunlight streaming through windows at a low angle, creating long shadows and a warm golden glow on surfaces.
Example: Afternoon to Golden Hour
Change this space to golden hour lighting (late afternoon). Show warm, soft sunlight streaming through windows at a low angle, creating long shadows and a warm golden glow on surfaces.
Pro Tips:
- Specify which lights turn on: "table lamps, floor lamps, pendant lights"
- Describe the mood: "cozy," "intimate," "peaceful," "dramatic"
- Mention windows: "show evening sky outside" or "darker windows"
- Consider shadows: "soft shadows from lamps," "warm glow on walls"
Why This Works:
AI understands lighting principles and can realistically simulate how different times of day affect interior spaces, including light sources, shadows, and color temperature.
Best Model: Flux Pro (accurate lighting simulation)
Why Nano Banana isn't the best for this technique: Nano Banana is great for precision editing like shown in Precision Editing, but when you’re changing lighting or time of day, the whole image needs to be re-rendered. Lights affect every object in the scene, so Nano Banana’s “don’t touch what you don’t have to” strength becomes a weakness here.
Technique 5: CAD Drawing to Rendered Floor Plan
Best For: Architects, designers presenting to clients, real estate developers
The Challenge:
You have a CAD floor plan (line drawing) and need a photorealistic top-down rendered view with furniture and materials.
The Solution:
Upload your CAD drawing and describe the style, materials, and furnishings for each room.
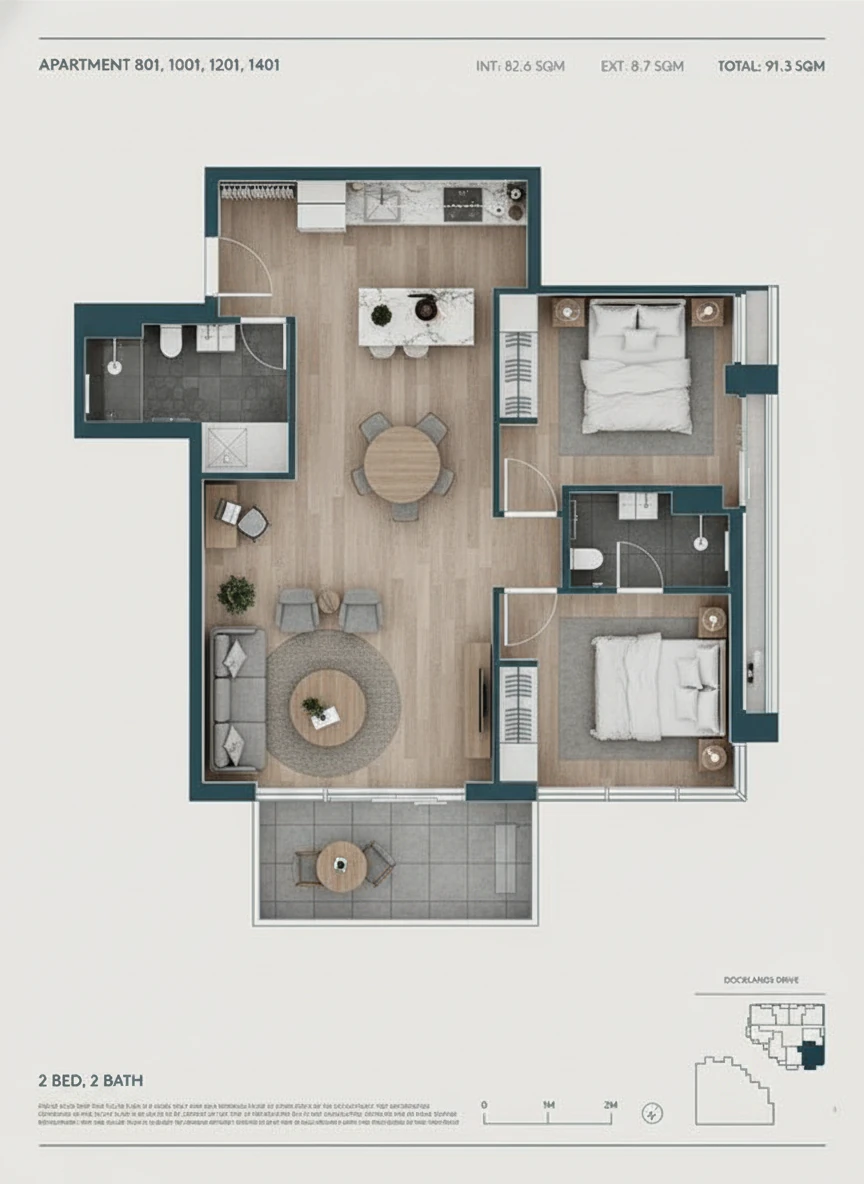
Convert this CAD floor plan into a photorealistic top-down rendering. Living room: modern style with gray sofa, wooden coffee table, area rug. Kitchen: white cabinets, marble countertops, stainless appliances. Bedroom: Scandinavian style with light wood bed, white bedding. Show realistic materials, textures, and lighting from above. Use a consistent colour palette for the output image. keep all texts unchanged.
Example Prompt:
Convert this CAD floor plan into a photorealistic top-down rendering. Living room: modern style with gray sofa, wooden coffee table, area rug. Kitchen: white cabinets, marble countertops, stainless appliances. Bedroom: Scandinavian style with light wood bed, white bedding. Show realistic materials, textures, and lighting from above. Use a consistent colour palette for the output image. keep all texts unchanged.
More Detailed Example:
Transform this architectural floor plan into a rendered 3D top-down view. Use these specifications:
- Living room: Japandi style, beige sofa, low wooden table, plants
- Dining area: wooden table with 6 chairs, pendant light
- Kitchen: modern white cabinets, black countertops, island with bar stools
- Master bedroom: king bed, nightstands, reading lamps
- Bathroom: white tiles, floating vanity, walk-in shower Show realistic textures, furniture placement, and soft overhead lighting.
Pro Tips:
- Specify style for each room
- List key furniture pieces
- Mention materials: wood type, tile color, fabric textures
- Request "top-down view" or "bird's eye view"
- Specify lighting: "soft overhead lighting," "natural light from windows"
Best Model: Nano Banana (architectural understanding and spatial accuracy)
Technique 6: Rotate Viewing Angle in a Room
Best For: Virtual tours, showing different perspectives, comprehensive room documentation
The Challenge:
You have a photo of a room from one angle and want to see it from a different angle (e.g., from the opposite wall or from a corner).
The Solution:
Describe the new viewing angle and what should be visible from that perspective.
Rotate the camera view of this photo 45 degrees towards the window on the right side, still keep the coffee table in the center of the image. Make no change of the furniture layout
Example: Rotate 45 Degrees
Rotate the camera view of this photo 45 degrees towards the window on the right side, still keep the coffee table in the center of the image. Make no change of the furniture layout
Pro Tips:
- Describe current view: "currently showing sofa facing us"
- Specify new angle: "from opposite wall," "from corner," "45-degree rotation"
- Mention what should be visible: "show the TV wall," "include the doorway"
- Request consistency: "maintain same furniture and style"
- Consider perspective: "realistic human eye-level view"
Why This Works:
AI can understand spatial relationships and reconstruct rooms from different angles, though results work best when the original photo shows enough context.
Best Model: Flux Pro (good with large proportion changes in the image)
Technique 7: Vibe Photos with Detail Variations
Best For: Social media content, design portfolios, showing design details
The Challenge:
You want to create multiple "vibe" shots focusing on different details of the same room (close-up of coffee table styling, corner reading nook, window view, etc.).
The Solution:
Generate variations that zoom into or highlight specific areas while maintaining the overall room aesthetic.
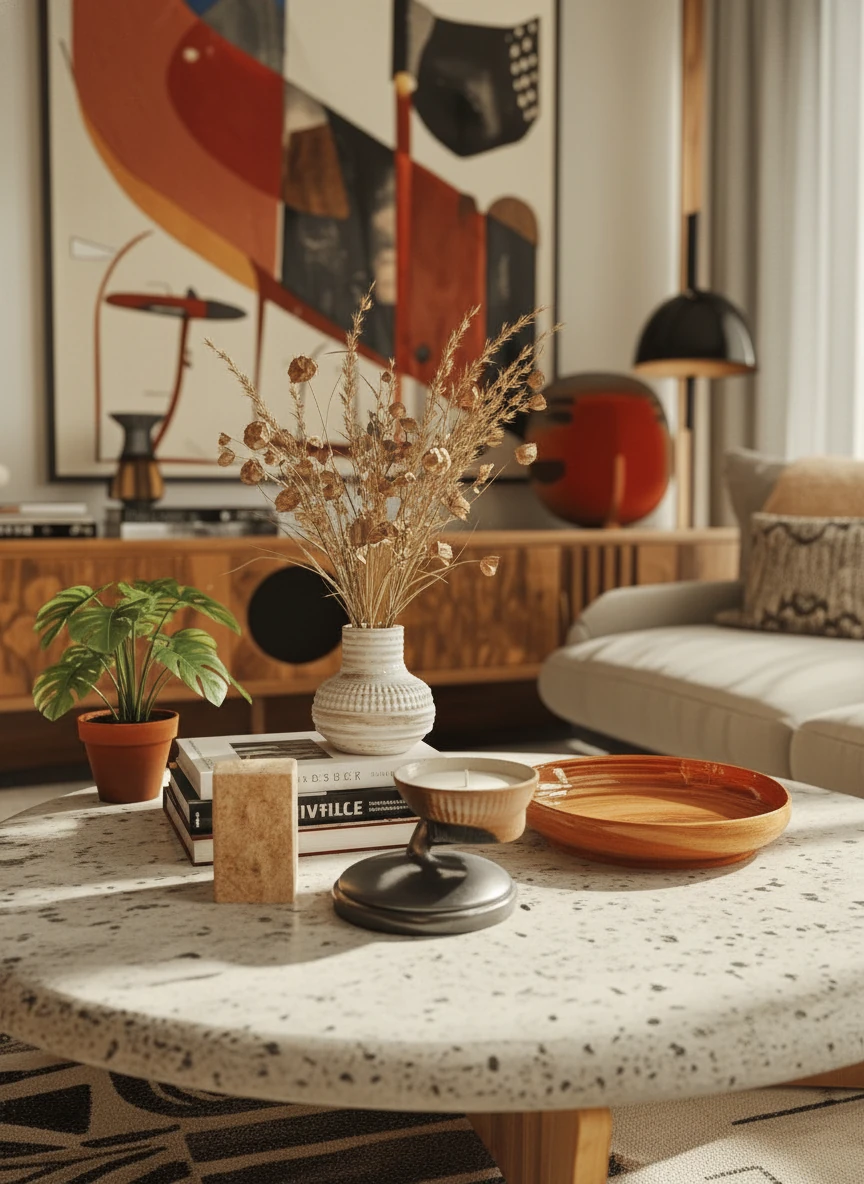
Create a close-up vibe photo of the coffee table in this living room. Focus on: the wooden table surface, styled with a ceramic vase with dried flowers, coffee table books, a candle, and a small plant. Show soft natural light, shallow depth of field, with the sofa blurred in the background. Cozy, intimate atmosphere.
Example: Coffee Table Styling Detail
Create a close-up vibe photo of the coffee table in this living room. Focus on: the wooden table surface, styled with a ceramic vase with dried flowers, coffee table books, a candle, and a small plant. Show soft natural light, shallow depth of field, with the sofa blurred in the background. Cozy, intimate atmosphere.
Example: Reading Nook Corner
Generate a detail shot of the reading corner in this room. Focus on: the armchair with textured throw blanket, side table with reading lamp and book, small plant, and window with natural light. Create a cozy, inviting vibe with warm lighting and intimate framing.
Example: Window View with Plants
Create a vibe photo focusing on the window area. Show: sheer curtains with soft natural light filtering through, potted plants on the windowsill, and a glimpse of the room's interior in soft focus. Peaceful, airy atmosphere.
Example: Texture Detail Shot
Generate a close-up detail photo showing textile textures: layered cushions on the sofa (velvet, linen, knit), throw blanket, and part of the wooden coffee table. Focus on textures and materials with soft, warm lighting. Tactile, cozy feel.
Pro Tips:
- Specify what to focus on: "coffee table," "reading corner," "window area"
- Describe composition: "close-up," "detail shot," "intimate framing"
- Mention depth of field: "blur background," "shallow focus"
- Include styling elements: books, plants, candles, textiles
- Describe mood: "cozy," "peaceful," "intimate," "warm"
Why This Works:
These detail shots are perfect for Instagram, Pinterest, or design portfolios, showing the thoughtful styling and atmosphere of a space.
Best Model: Nano Banana (accurate detail rendering)
Technique 8: Remove Furniture from Cluttered Rooms
Best For: Real estate staging, showing space potential, decluttering visualizations
The Challenge:
A room is filled with furniture or clutter, and you need to show it empty or with minimal furnishings.
The Solution:
Specify which items to remove while keeping the room's structure intact.
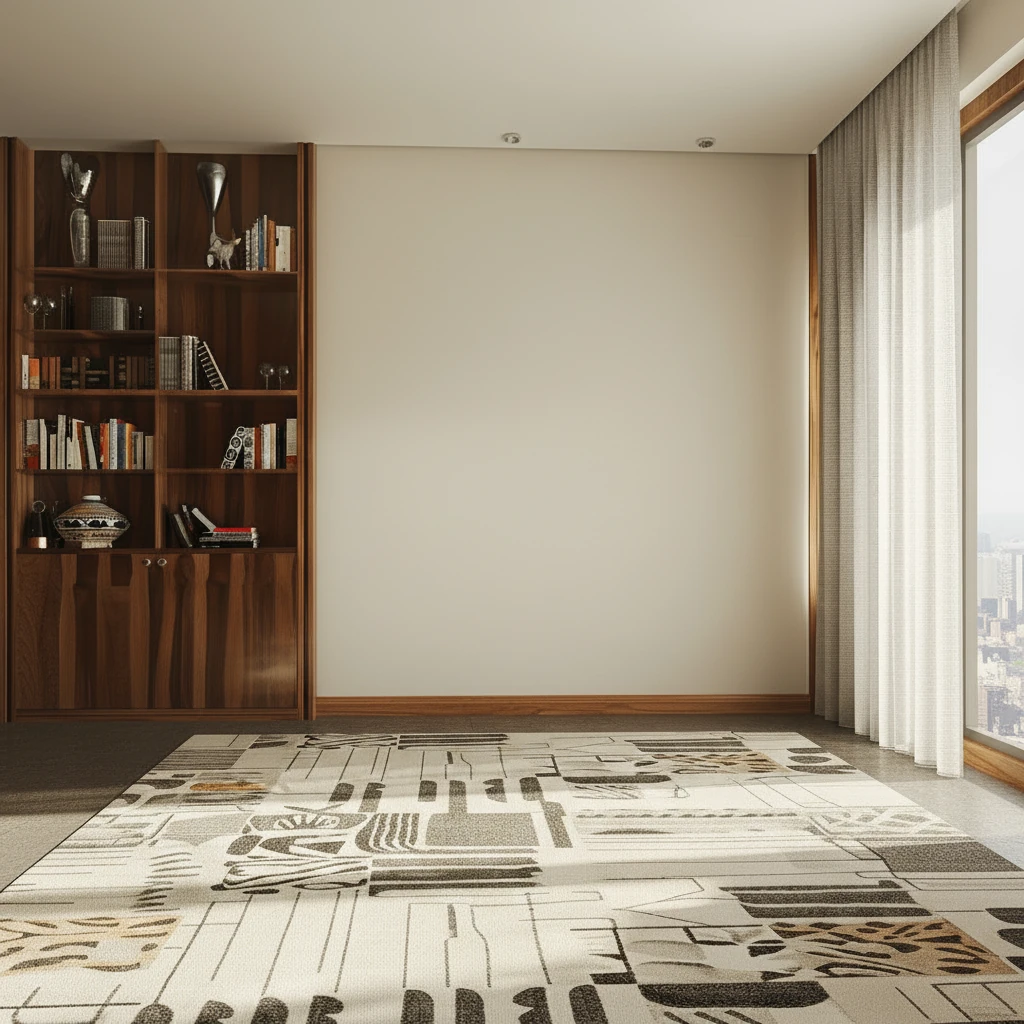
Remove all furniture from this living room, leaving only the walls, windows, flooring/Carpets, and built-in features. Show an empty, clean space with natural lighting. Maintain the room's architectural details."
Example: Complete Furniture Removal
Remove all furniture from this living room, leaving only the walls, windows, flooring, and built-in features. Show an empty, clean space with natural lighting. Maintain the room's architectural details.
Example: Partial Decluttering
Remove excess furniture and clutter from this room. Keep only: the sofa, coffee table, and one plant. Remove all other items, decorations, and unnecessary furniture. Create a clean, minimalist space.
Example: Virtual Destaging
Remove all personal items, furniture, and decorations from this bedroom. Show the empty room with just walls, windows, flooring, and closet doors. Clean, neutral, ready for staging or renovation.
Pro Tips:
- Be specific about what to remove: "all furniture," "excess decor," "personal items"
- Specify what to keep: "built-in shelving," "light fixtures," "flooring"
- Request clean presentation: "show clean walls," "maintain lighting"
- Consider purpose: "ready for staging," "show space potential"
Best Model: Nano Banana (precise object removal with context preservation)
Learn more: Precision Editing with Nano Banana
Technique 9: Clean Up Messy Rooms for Listings
Best For: Real estate photography, rental listings, quick property prep
The Challenge:
A room has clutter, personal items, or outdated decor that makes it unphotogenic for listings.
The Solution:
Ask AI to declutter and neutralize while keeping the core structure and good furniture.
Clean up this bedroom for a real estate listing. Remove: personal photos, clutter on nightstands, clothes, excessive decorations. Keep: bed, nightstands, lamps, basic furniture. Make it look neat, neutral, and appealing to buyers. Bringing some beautiful lighting making the room feel cozy and warm
Example: Listing-Ready Bedroom
Clean up this bedroom for a real estate listing. Remove: personal photos, clutter on nightstands, clothes, excessive decorations. Keep: bed, nightstands, lamps, basic furniture. Make it look neat, neutral, and appealing to buyers. Maintain natural lighting.
Example: Tidy Living Room
Prepare this living room for listing photos. Remove: personal items, excess throw pillows, clutter on coffee table, kids' toys. Keep: sofa, coffee table, TV stand, one plant. Create a clean, staged appearance that buyers can envision themselves in.
Example: Neutral Kitchen
Clean up this kitchen for listing. Remove: personal items on counters, refrigerator magnets, clutter, dated decorations. Keep: appliances, basic structure, clean countertops. Show a neutral, move-in ready kitchen.
Pro Tips:
- Specify removal targets: "personal items," "clutter," "dated decor"
- List what to keep: "basic furniture," "appliances," "structure"
- Request neutral appeal: "buyers can envision themselves"
- Maintain good lighting: "keep natural lighting," "bright and clean"
Why This Works:
Perfect for real estate agents who need quick listing photos without expensive staging or asking occupants to move out.
Best Model: Nano Banana (selective editing with context preservation)
Model Selection Guide for Advanced Techniques
Nano Banana (15–45s)
- ✅ Best for: Techniques 1, 2, 3, 5, 7, 8, 9
- ✅ Excels at: Spatial reasoning, precise editing, multi-image composition
- ✅ Use when: Accuracy and quality are critical
Flux (25s)
- ✅ Best for: Technique 4 (lighting changes) and some cases of Technique 6
- ✅ Excels at: Fast generation, strong mood and lighting changes
- ✅ Use when: You need major change in the image or when Nano Banana is too "careful"
Pro Workflow:
Use Nano Banana for all technical transformations. Use Flux for quick lighting-related mood changes and bigger perspective shifts.
Learn more: Complete Model Comparison Guide
Frequently Asked Questions
Which technique should I use for virtual staging?
Use Technique 1 (piece furniture together) or Technique 8 (remove existing furniture first, then add new).
Can I replace just the sofa fabric without changing the sofa shape?
Yes! Use Technique 3 (replace textiles) and specify "change upholstery fabric only, keep sofa shape and size."
How accurate is CAD to rendering?
Technique 5 produces realistic renderings but may interpret some details. Provide detailed descriptions for best results.
Can I rotate viewing angles for any room?
Technique 6 works best when the original photo shows enough context. Results may vary for very limited views. If you try 180 degrees, you will obviously get unstable results as the majority of the content is hallucinated by AI.
What's the difference between Technique 1 and 2?
Technique 1 adds multiple new furniture pieces to a room. Technique 2 replaces one existing piece with another, which generally provides better result.
Is this suitable for professional client presentations?
Absolutely. All techniques produce high-quality, photorealistic results suitable for client presentations, proposals, and marketing materials. Use the Upscale feature to make them ready for large-screen presentations.
How do I get started?
Start with simpler techniques (2, 3, 4) to understand the workflow, then progress to complex multi-image compositions (1, 5).
Ready to Master Advanced Interior Design with AI?
These 9 techniques give you professional-grade capabilities that were previously only possible with expensive 3D software or rendering services.
Start with basic styling? Check out our Interior Design Styles Guide first.
Try it now — transform your interior design workflow with advanced AI techniques.
Related Resources
Product Features:
- Precision Editing — Master precise area editing
- Image Reference Editing — Multi-image composition guide
- Text to Image Generation — Create from scratch
Styling Guides:
- Interior Design Styles Guide — Learn basic styling first
- Model Selection Guide — Choose the right AI model
- Multi-Model Pipeline — Chain models for best results
Comparisons:
- Best AI Image Generator 2025 — Detailed benchmarks
- AI Model Comparison — Compare all models
Banana Designer — Professional interior design transformations powered by AI.
